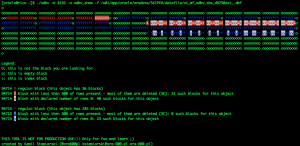
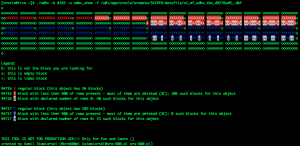
It’s time for the next article with ODBV visualisation 🙂
This time let’s examine the difference between move and shrink – this is very common question on a lot of trainings. You can find a lot of great articles in the Internet regarding this subject but I think that visualisation really helps to understand what is really going on at the low level.
Let’s start with MOVE.
At the beginning I’ll create a new tablespace:
SQL> !cat odbv_tbs.sql
create tablespace odbv_tbs
datafile size 8m
autoextend on next 8m
maxsize 1g
/

select file_name
from dba_data_files
where tablespace_name='ODBV_TBS'
/

SQL> @odbv_tbs.sql

Tablespace created.


FILE_NAME
--------------------------------------------------------------------------------
/u01/app/oracle/oradata/SKIPER/datafile/o1_mf_odbv_tbs_d920r9c5_.dbf
And a new table, based on table EMPLOYEES from schema HR.
SQL> create table hr.employees_move tablespace odbv_tbs
  2  as
  3  select *
  4  from hr.employees;

Table created.

SQL> insert into hr.employees_move select * from hr.employees_move;

107 rows created.

SQL> /

214 rows created.

SQL> /

428 rows created.

SQL> /

856 rows created.

SQL> /

1712 rows created.

SQL> /

3424 rows created.

SQL> /

6848 rows created.

SQL> commit;

Commit complete.

SQL> alter system checkpoint;

System altered.

SQL> select data_object_id
  2  from dba_objects
  3  where object_name='EMPLOYEES_MOVE';

DATA_OBJECT_ID
--------------
	 94710
Now let’s create a config file for ODBV
[oracle@rico ~]$ cat odbv_show
94710:X|RED
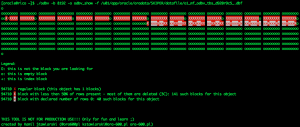
The graphic representation for this table looks like this:
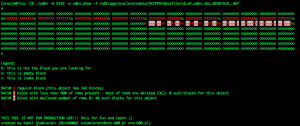
Now let’s delete a bunch of rows from the table and check how it looks at a datafile level:
SQL> delete hr.employees_move
  2  where department_id in (50,80);

10112 rows deleted.

SQL> commit;

Commit complete.

SQL> alter system checkpoint;

System altered.
As you can see most of the table blocks have less then 50% of rows present in the block. You should understand that DELETE does not remove anything from the table block – the rows are only marked as deleted by flag 3C (the regular row is marked by flag 2C).
So this means that more then a half rows were marked as deleted in almost every block in a table.
Now let’s check what will happen after ALTER TALBE MOVE.
SQL> alter table hr.employees_move move;

Table altered.

SQL> select data_object_id
  2        ,object_id
  3  from dba_objects
  4  where object_name='EMPLOYEES_MOVE';

DATA_OBJECT_ID	OBJECT_ID
-------------- ----------
	 94711	    94710
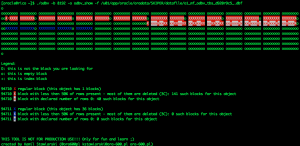
So what has happened in here? MOVE command forced building of a brand new segment. You can see, that DATA_OBJECT_ID has changed – that’s why I had to update the config file:
[oracle@rico ~]$ cat odbv_show
94710:X|RED
94711:X|BLUE
Now the blue "X" represents the new instance of the table (the new segment) and the red "X" represents the old one. As you can see, the blocks were not removed from a tablespace. To be honest – they were just marked as reusable.
So let’s check what will happen when I’ll create a new table in the same tablespace:
SQL> create table hr.employees_move2 tablespace odbv_tbs
  2  as
  3  select *
  4  from hr.employees_move;

Table created.

SQL> insert into hr.EMPLOYEES_MOVE2
  2  select *
  3  from hr.EMPLOYEES_MOVE2;

3584 rows created.

SQL> /

7168 rows created.

SQL> /

14336 rows created.

SQL> commit;

Commit complete.

SQL> alter system checkpoint;

System altered.

SQL> select object_id, data_object_id
  2  from dba_objects
  3  where object_name='EMPLOYEES_MOVE2';

 OBJECT_ID DATA_OBJECT_ID
---------- --------------
     94712	    94712
Now we have modify the config file again to display a blocks representation for the new table:
[oracle@rico ~]$ cat odbv_show
94710:X|RED
94711:X|BLUE
94712:Y|WHITE
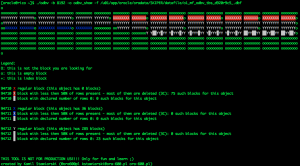
The blocks marked as white Y consumed a lot of space, used previously by original segment (red X).
OK. Now let’s repeat the situation with SHRINK instead of MOVE.
I’ve created a new table in a new tablespace, called EMPLOYEES_SHRINK (I did it in a same way as a previous table)
SQL> select data_object_id
  2  from dba_objects
  3  where object_name='EMPLOYEES_SHRINK';

DATA_OBJECT_ID
--------------
	 94714
This is the visualisation of the table blocks, after deleting rows in a same way as previously and executing SHRINK command:
SQL> delete hr.EMPLOYEES_SHRINK
  2  where department_id in (50,80);

10112 rows deleted.

SQL> commit;

Commit complete.

SQL> alter system checkpoint;

System altered.

SQL> alter table hr.EMPLOYEES_SHRINK enable row movement;

Table altered.

SQL> alter table hr.EMPLOYEES_SHRINK shrink space;

Table altered.

SQL> alter system checkpoint;

System altered.
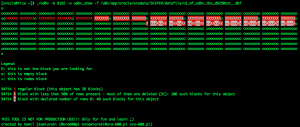
We can see above, that rows were packed into the first blocks of the segment.
Now let’s check how the situation will change after adding another table (like in previous example).
SQL> ed
Wrote file afiedt.buf

  1  create table hr.employees_shrink2 tablespace odbv_tbs
  2  as
  3  select *
  4* from hr.employees_shrink
SQL>
SQL> /

Table created.

SQL> insert into hr.employees_shrink2 select * from hr.employees_shrink2;

3584 rows created.

SQL> /

7168 rows created.

SQL> /

14336 rows created.

SQL> commit;

Commit complete.

SQL> alter system checkpoint;

System altered.

SQL> select data_object_id
  2  from dba_objects
  3  where object_name='EMPLOYEES_SHRINK2';

DATA_OBJECT_ID
--------------
	 94715
As you can see, most of the blocks were consumed by blue "Y" (representation of table EMPLOYEES_SHRINK2).
Below you can see what will happen after executing ALTER TABLE SHRINK SPACE COMPACT and creating a new table in the same tablespace:
As you can see, that a new table didn’t consume blocks of the old one. Old blocks are being reserved for the first table and will reused by it, when new data arrives.
So to sum things up:
- ALTER TABLE MOVE creates a new physical segment at the end of datafile and assigns new DATA_OBJECT_ID (this is one of the reasons, you have to rebuild indexes after that)
- ALTER TABLE SHRINK SPACE doesn’t create a new segment and does not change DATA_OBJECT_ID – instead the rows are being moved inside a blocks to defragment the object. Old extents can be reused by the same object or by other objects in the same tablespace
- ALTER TABLE SHRINK SPACE COMPACT doesn’t create a new segment and does not change DATA_OBJECT_ID – instead the rows are being moved inside a blocks to defragment the object. Old extents can be reused only by the same object
That’s it. Hope I cleared some things up 🙂

